 |
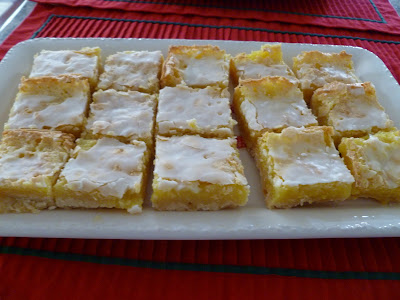
| Three-Layer Lemon Bars |
Last year I had blogged about
some tips when hosting a dessert party. I usually host a big-to-me dessert party only every other year and
last year was it so this was my off year. However, I do generally have a few guests over throughout the season to catch up with friends or host family. Last Saturday was my first gathering of the season where I hosted a dozen family members for an impromptu post-Thanksgiving get together. They came around lunchtime and, as you know, I don't cook, but thankfully my mom brought arroz caldo (a Filipino rice porridge) and my cousin Christine brought a pizza. I made the desserts:
lemon bars with lemons from my mom's lemon tree,
buttery tea balls because my mom likes anything with pecans and I had ceramic mitten dishes to serve the "snowballs" in, and
red velvet cookies because they're my niece Shyla's favorite and a chocolate item my nephew Jason will eat (he doesn't like chocolate. Someday I'm going to tell him red velvet is chocolate. But not yet.)
 |
| "Snowballs" aka Buttery Tea Balls in mitten dishes |
I'm hosting another gathering with a few friends from high school tomorrow. I had missed my has-it-really-been-25-years high school reunion last month because I was at my cousin's wedding in Winnipeg. So I thought it would be fun to catch up with a few old friends. The family gathering last weekend spurred me to finish my decorating and my house is now reasonably clean (mostly) so it's fit for company. But there's still the matter of what to serve.
 |
| Red Velvet Cookies |
The issue when you work full time and have other things going on during the holiday season is there usually isn't enough time to get everything done that you want to do, including party prep. Which is why I
stock up my baking pantry ahead of time,
make up cookie doughs for the freezer and
salvage any baking failures when necessary. One key component of advance prep is selecting the right menu. First, when deciding what to serve, play to your strengths. My cousin Chris is a trained chef and he put on a 7-course meal for his family at Thanksgiving. I'm sure it was superb. But you won't catch me hosting a full-course dinner anytime soon (or ever) simply because my cooking skills are subpar and I don't enjoy cooking like I do baking. So it's always going to be a dessert party for me. I know my limits, lol.
Second, parties are not typically the time or place to take risks on new recipes unless you're absolutely sure they'll turn out, it's something similar to what you've done before
and you have a backup plan if it fails. In other words, now is the time to be risk averse with the menu. I might try a new cookie recipe if it's one cookie out of several kinds that I'm serving but I'm not likely to take on a towering croquembouche as my dessert centerpiece. Seriously.
Third, time management is essential. Last year I blogged about how I like to have a variety of flavors that will be crowd pleasers and/or past favorites of my guests. But I also take into account which ones I can make ahead of time and balance those with the items that have to be done the day of the party or at the last minute. I work full time, I sometimes have social engagements after work, and errands always need to be run to the bank, the gas station, the library, the grocery store, the post office, etc, all in the same 24 hours in a day when it isn't the holiday season.
For this weekend's dessert party, my menu was driven by both what I thought my guests might like and what I could reasonably accomplish in the time I had. I already had
peanut butter brownies in the freezer that I had baked earlier in anticipation of needing it this week. Then every night this week that I didn't have dinner plans after work, I made cookie dough. One night, I made cookie dough for
peanut butter kiss cookies, the next night I made cookie dough for holiday caramel treats (recipe to follow), a third night I made cookie dough for
Almond Butter and Nutella Swirl Cookies. Each of these cookie doughs took a grand total of 10-15 minutes (if that) to put together, portion into individual cookie dough balls and store in ziploc bags in my freezer, ready to be baked off at a moment's notice. The point being I could make it when I had 10-15 minutes to spare this week, not when I have to make it in a rushed timeframe right before the party.
Which frees me up to focus on the more last-minute baking the night before and the day of the party. Since I'm a stickler for freshness, the only thing I'm actually going to bake the night before are
lemon bars. They'll be fresh enough the day after they're made and they're actually a bit better the next day because they've had time to set. On the morning of the party, I'm going to bake some of the cookie doughs I had already made but that will only take baking and clean up time. Which leaves me free to tackle a whole new recipe without being too frazzled. I chose a doughnut recipe because I don't often have people over and that's the ideal time to try something like doughnuts because they're best when they're fresh out of the fryer and can be mass consumed by people besides yourself. I'm certainly not going to eat a whole batch of doughnuts by myself! Plus I consider the risk of failure to be minimal - it's hard to go wrong with something deep-fried, rolled in cinnamon sugar and served warm. Doughnut recipe to follow.....as soon as I actually make it.


